Start here
Getting started
Create one shared timer Room, keep Host controls on the operator's device, and open the right read-only output on every other screen. This guide covers the simplest setup: one Host, one Operator when timing needs to be delegated, and one Display.
One Room is the source of truth.
Do not create separate timers for the operator, the projector, and the presenter. They should open different views of the same Room so every device follows one live timer state.
Step 1
Create your first Room.
Choose Create room to open a new private Host workspace. A new Room begins as New Timer Room with one timer named Presentation set to 10:00.
These are starting values, not a preset agenda. Rename the Room or timer and adjust the duration before the session, then keep using this Room as you add more timing segments.
Step 2
Keep Host on the control device.
Host is the Room's control surface. Use it on the laptop or tablet operated during the session to start, pause, select, and adjust timers. It also shows the active timer, the next item, and connected devices. After a second timer exists, hover the gap between two cards and click the connector to set Start after previous on the lower timer.
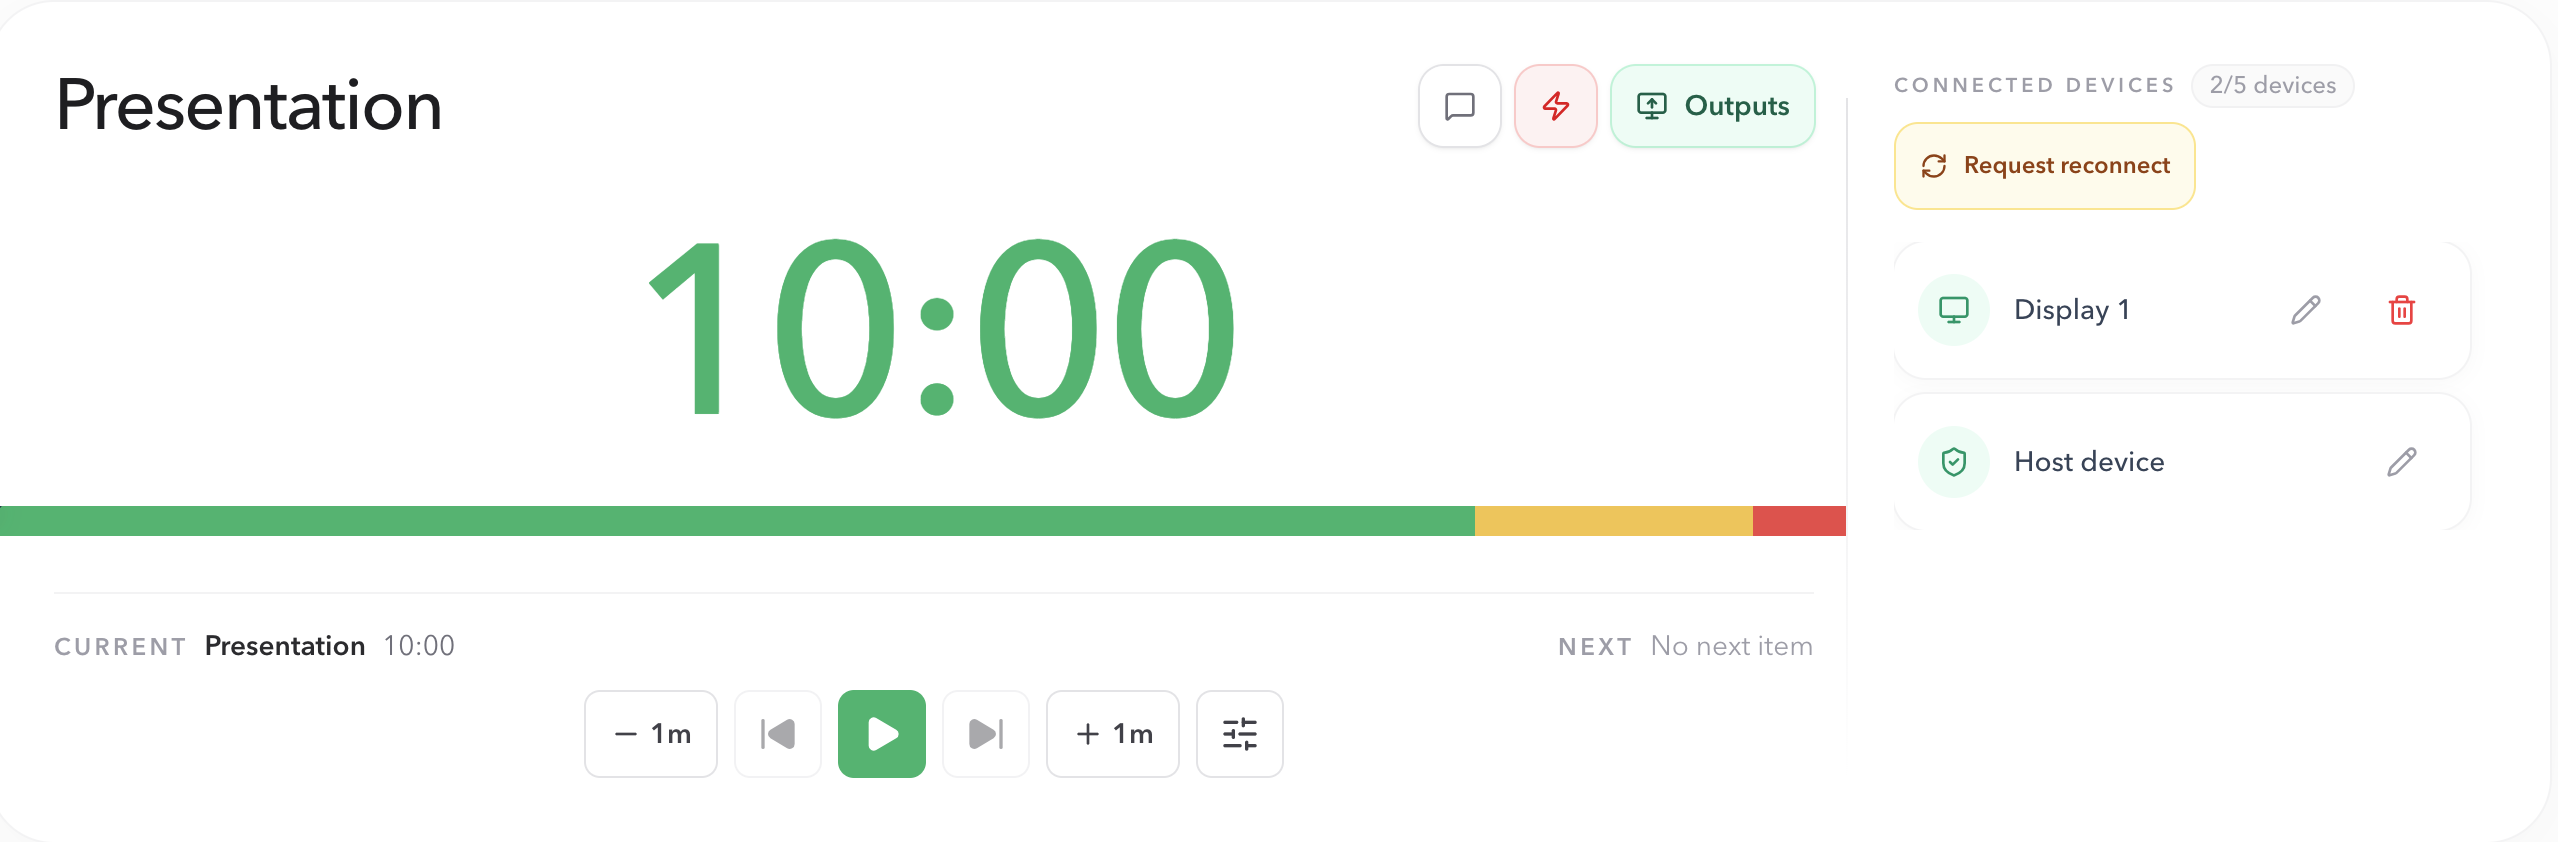
Treat the Host link like a control key. Do not use it for a projector, public display, or a person who only needs timing information.
Step 3
Open the right output for each screen.
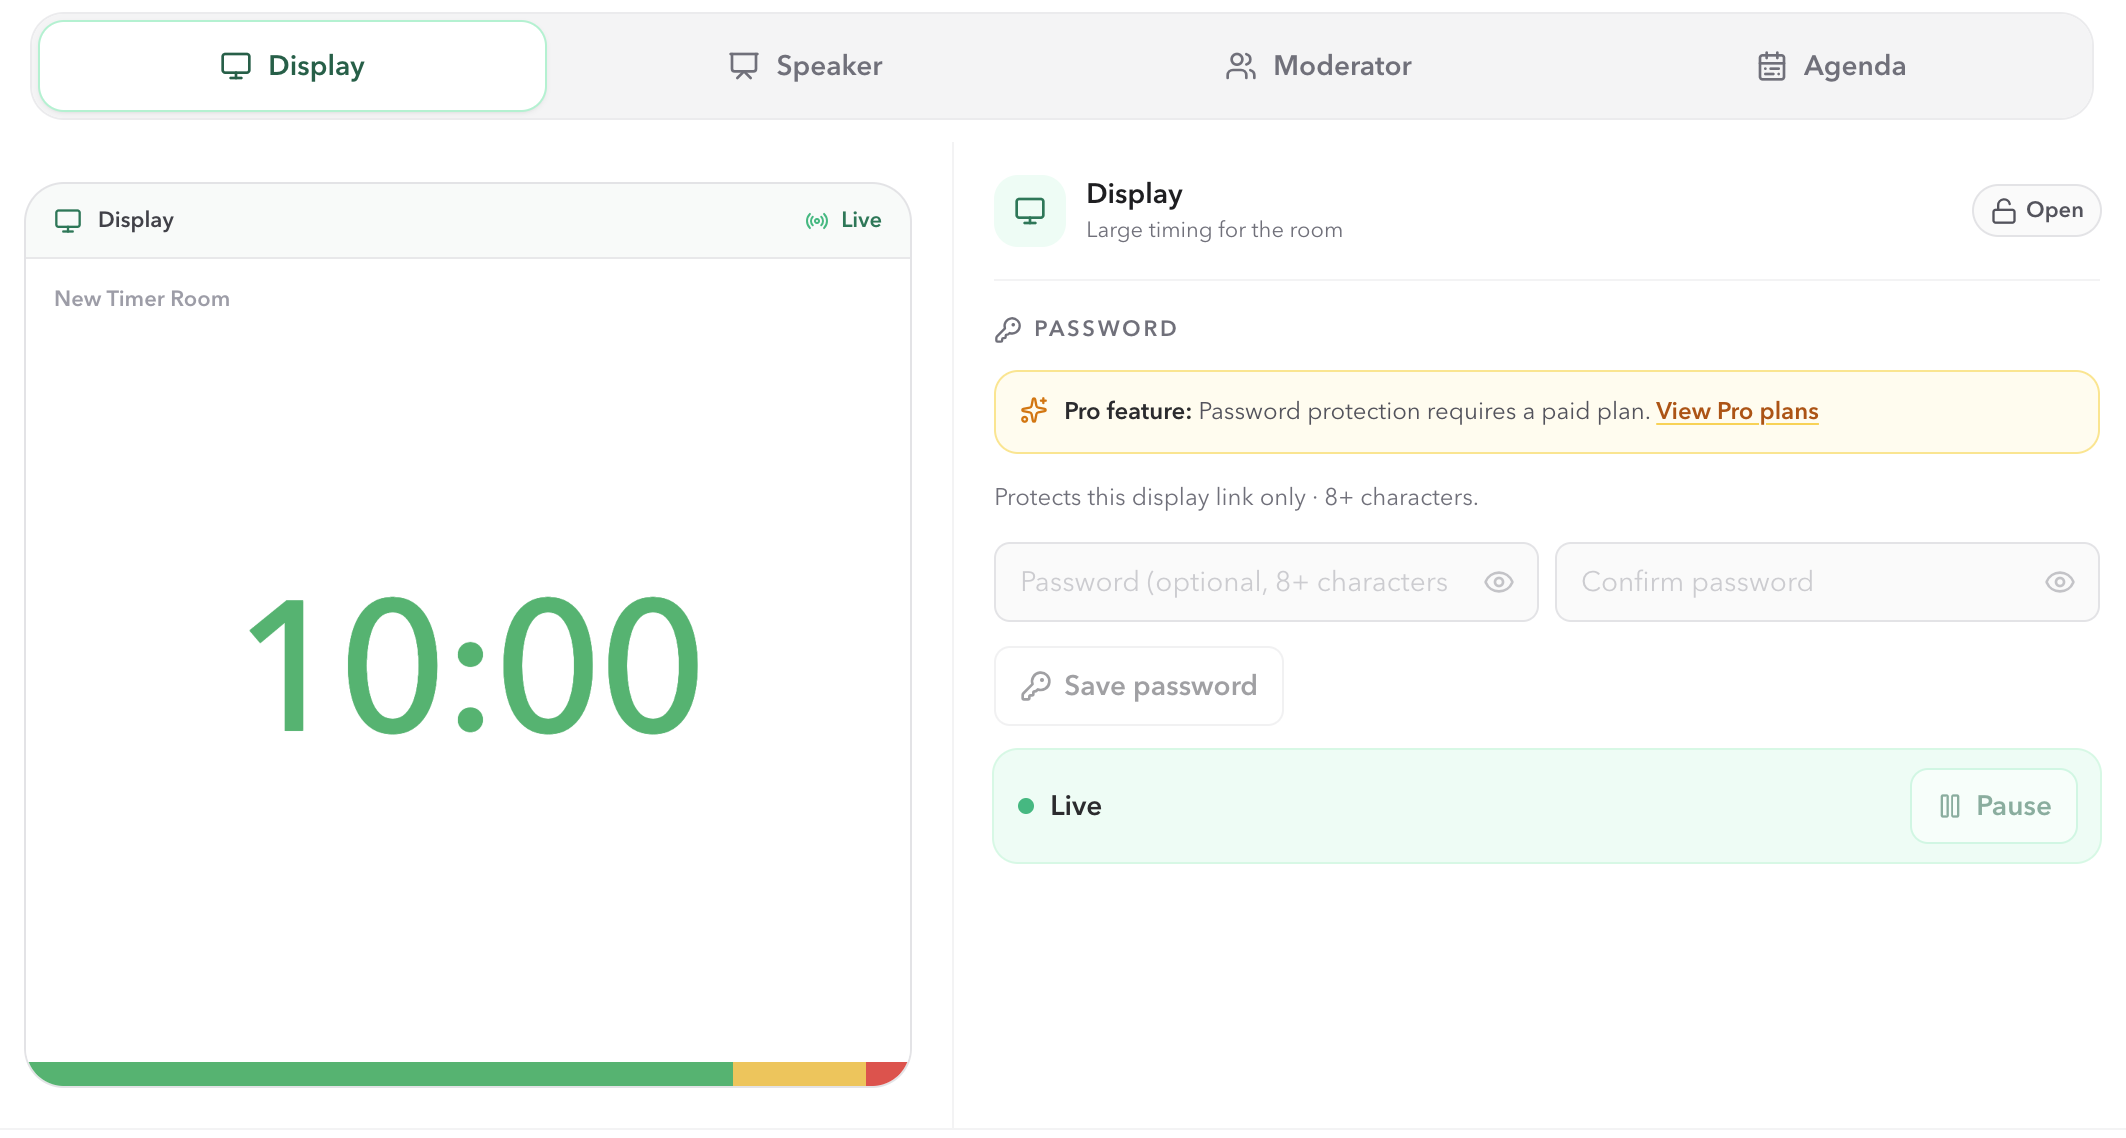
In Host, choose Outputs to open a view of the same Room. Select the role that matches the person or screen, then use its link or Open control on that device.
- Operator
- Touch timing control for a producer or stage manager who needs to run the live clock.
- Display
- Large timing for a projector, confidence monitor, second screen, or screen share.
- Speaker
- Personal timing context for the presenter.
- Moderator
- Read-only room monitoring for a producer, facilitator, or stage manager.
- Agenda
- The running order and current progress for people who need to follow the session.
Step 4
Rehearse the connection before the session.
- 01Keep Host open on the operator's device and open Display on the shared screen.
- 02Start the active timer from Host.
- 03Confirm that Display shows the same timer and remaining time without Host controls.
- 04Open Operator for live timing control, or Speaker, Moderator, or Agenda for people who need their specific timing context.
- 05Pause or reset from Host and confirm the shared output follows the change.
Before going live
Confirm the live setup.
- The Room, active timer name, and duration are correct.
- Host stays only with the operator.
- The projector or shared screen has the Display output open.
- Every presenter or producer has the output role they need.
- Starting, pausing, and resetting in Host reaches the intended shared screen.
FAQ
Common getting started questions
Which link should remain private?
Keep the Host link private. Operator can run live timing, while Host remains the full workspace for editing timers, Messages, questions, and Outputs. Display, Speaker, Moderator, and Agenda are read-only output links.
Do I need a separate Room for the projector?
No. Create one Room, then open its Display output on the projector or second screen. It follows the same active timer as Host.
Which output should I share with each person?
Use Operator for live timing control, Display for the room, Speaker for a presenter, Moderator for backstage monitoring, and Agenda for people who need the running order. Every view is tied to the same Room but shows different context.
Can an output link control the timer?
Operator can start, pause, reset, switch, and adjust live timing. Display, Speaker, Moderator, and Agenda follow the Room state without controls. Return to Host for editing timers, Messages, questions, or Outputs.